Installing certificates on Windows Mobile 6
Last update: Dec 13, 2007
1.1 Introduction
Windows Mobile 6 has improved support for installing certificates.
There are two methods for installing a certificate on your device: you
can either import a certificate from a file or you can "enrol" at a
Certificate Authority using HTTP. Previous versions of Windows Mobile
could only import root certificates. Windows Mobile 6 now also supports
importing a personal certificate from a PKCS#12 file. Windows Mobile 6
is also the first version to support the certificate enrolment feature
in ActiveSync 4.5. Once an X.509 personal certificate is installed, you can use it to for
user
authentication on the Pocket PC. The imported certificate can be used
in the following
scenarios:
Once an X.509 personal certificate is installed, you can use it to for
user
authentication on the Pocket PC. The imported certificate can be used
in the following
scenarios:
- User authentication in L2TP/IPsec VPNs (more
info).
- Web client authentication in Pocket Internet Explorer (SSL,
HTTPS) (more
info).
- User authentication in 802.1x wireless networks (EAP-TLS only) (more
info).
- Exchange ActiveSync certificate-based authentication (more info).
- Microsoft Office Communicator Mobile Client (more
info).
- Sending and receiving encrypted e-mail (more
info).
- Other third-party applications that happen to support Personal
certificates.
1.2 Author
The author of this document is Jacco de Leeuw (contact me).
Corrections, additions, extra information etc. are much appreciated.
2. Contents
3. Background information
Windows
Mobile 6 for Pocket PC, which is often abbreviated to WM6 is
based on a light-weight variant of Windows called
Windows CE.
As
mentioned in the introduction, there are three main applications of
Personal Certificates: L2TP/IPsec, EAP-TLS and web
client
authentication.
A number of things are new
in WM6:
- PKCS#12 files can now be imported directly with File Explorer.
Previously you needed an application such a P12imprt
or PFXimprt.
- The "Certificates" applet in the System menu shows "Intermediate"
certificates. Previous versions of Windows Mobile already supported
intermediate certificates, but they were not displayed by the
"Certificates" applet. So you could not view or delete them.
- Certificate web enrolment is supported when used with ActiveSync
4.5.
- The built-in certificate installer will install root certificates
even if your device is
locked. On previous versions of Windows Mobile this was a privileged
operation which failed on locked devices.
- Wildcard certificates (e.g. CN=*.example.com)
are supported with SSL.
- WM6 ships with a few more root certificates: AAA Certificate
Services, AddTrust External CA Root, Baltimore CyberTrust Root,
GeoTrust Global CA, Go Daddy Class 2 Certification Authority,
www.valicert.com, Starfield Class 2 Certification Authority (see also this
page).
(Read this
section of the
P12imprt webpage for more background information).
Back to Contents
4. Obtaining a PKCS#12 certificate file
Read this
section on the
P12imprt webpage if you don't know how to obtain or create a personal
certificate and corresponding private key.
Back to Contents
5. Importing a certificate on Windows
Mobile 6
You can import root certificates and personal certificates. Root
certificates need to
be in PEM (text, Base64
encoded) or DER
(binary) format. Root certificate files have the extension .cer
or .p7b and contain a single certificate or a PKCS#7
certificate chain. Personal certificates need to be in PKCS#12 format
and have the
extension .pfx or .p12. PKCS#12 files
typically
contain a
personal certificate and its corresponding private key, a root
certificate and optionally a number of intermediate CA certificates.
Here is how to import a file containing one or more certificates on the
Windows Mobile device:
- Copy the certificate file to
your Windows Mobile
6 device. You can use any method to do the transfer: ActiveSync, a
flash
memory
card, Bluetooth, infrared etc.
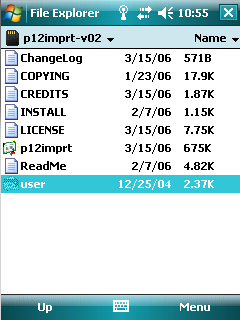
- Tap "Start", "Programs" and "File Explorer".
- Tap the
certificate file that you want to import.
(Note: File Explorer does not show extensions, so make sure you select
the correct file, for example by checking the file size).
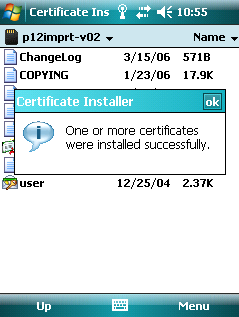
- Enter
the password that was used to encrypt the PKCS#12 file. No password
have to be entered for importing root certificate files.
- The certificate(s) included in the file are imported: "One ore
more certificates
were installed successfully.". If an
equivalent certificate (i.e. with the same name) already exists on your
Windows Mobile device, it will be silently overwritten. So make sure
you tap the correct certificate file.
- Exit File Explorer.
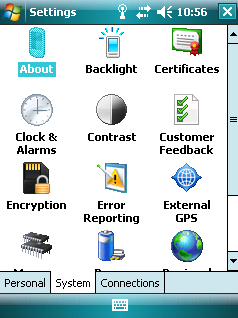
View the certificates that have been imported to the Pocket PC
device:
- In the Settings menu, tap the "System" tab. Then tap "Certificates".
- Select the "Personal" tab if it has not been selected already.
At the top of the page the following text is displayed: "Use
personal certificates to
positively identify yourself to others."
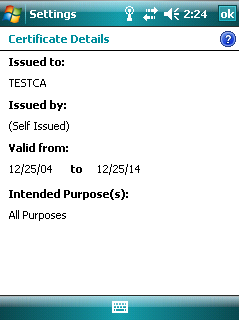
- If you imported a PKCS#12 file, you should see the newly
added personal certificate. If you tap the name of this personal
certificate, you should
see its details.
Tap "OK" to return to the previous window.
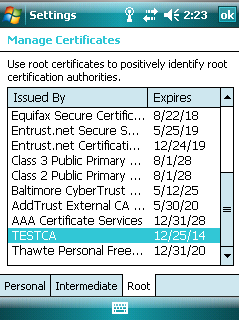
- Tap the "Root" tab.
You should now see the new root
certificate that you
added. If you tap on the name of this root certificate, you should see
its details.
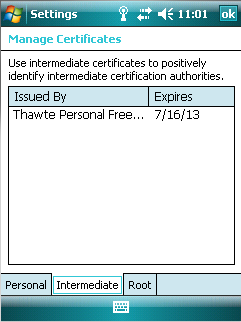
- Tap the "Intermediate"
tab. If there were any intermediate certificates in the PKCS#12 or
PKCS#7 file you should see them here. If you tap on the name of an
intermediate certificate, you
should see
its details.
If you have installed my sample root certificate ("TESTCA") and
personal
certificate ("TESTUSER") you will probably want to delete them
afterwards. Use the "Certificates" applet
in Settings->System. Tap and hold the name of the certificate.
A context menu will pop up. Select "Delete" to delete the certificate.
Back to Contents
6. Importing a personal certificate with
PFXimprt or P12imprt
Both my programs P12imprt and PFXimprt work on WM6. But unlike WM6's
built-in
certificate installer, they will cause WM6 to display a popup. I would recommend P12imprt over PFXimprt.
- In general, follow the instructions
on my P12imprt page.
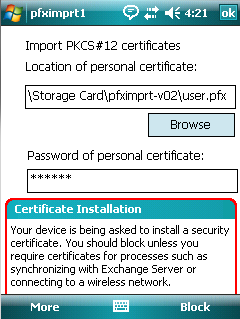
- Run
P12imprt.exe, enter the password and tap "Import certificate".
- You will see a popup asking whether you want to block
or install the root certificate in the file: "Your device is
being
asked to install a security certificate."
- Tap "More".
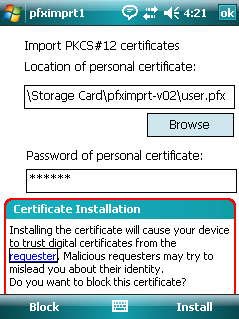
There will be another popup with yet another warning.
- Tap "Install".
(Optionally you can tap "Requester"
for verification.
This will display the SHA-1 thumbprint of the certificate, its issuer
and its subject).
If you tap "Block",
WM6 will not allow the certificate to be installed. However, there is
something odd with WM6. If the root certificate already exists,
P12imprt / PFXimprt asks you if you want to overwrite the certificate
or not. If you select "Overwrite", WM6 asks if you want to block or
install the root certificate. If you tap "Block", the root certificate
will not be overwritten but for some reason WM6 deletes the existing
root certificate instead of leaving it alone. Looks like a bug to me.
You would expect the
CertAddEncodedCertificateToStore(CERT_STORE_ADD_REPLACE_EXISTING)
call to be an atomic operation.
On some locked devices
such as Smartphones the root certificate may fail to install, even if
you allow WM6 to continue. In such cases it is recommended to use WM6's
built-in certificate installer.
Older versions of P12imprt
and Crtimprt did not import certificates correctly for use with S/MIME.
This has been resolved in updated versions.
Back to Contents
7. Web enrolment
Web enrolment is an alternative to importing a certificate from a
file. Clients "enrol" at a webbased Certificate Authority. Enrolment
means that you contact a certificate server and request the server to
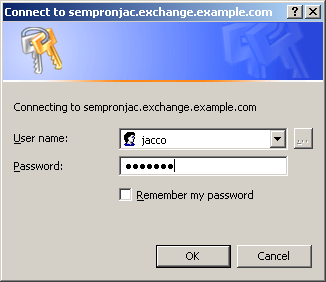
issue a certificate. The server will ask for your credentials, such as
a username and password, before issuing the certificate. Enrolment
requires a web enrolment utility on the Windows Mobile device, and on
the server Microsoft Certificate Services is required (no other CA is
supported). Web enrolment is (somewhat)
documented on the Microsoft website.
7.1 Web enrolment with ActiveSync
Windows XP and earlier use ActiveSync for web enrolment.
Some
vendors ship an enrolment utility for previous versions of Windows
Mobile
but Windows Mobile 6 now contains a built-in support for web
enrolment. But this only works in combination with ActiveSync 4.5.
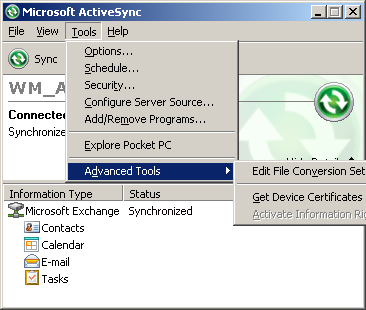
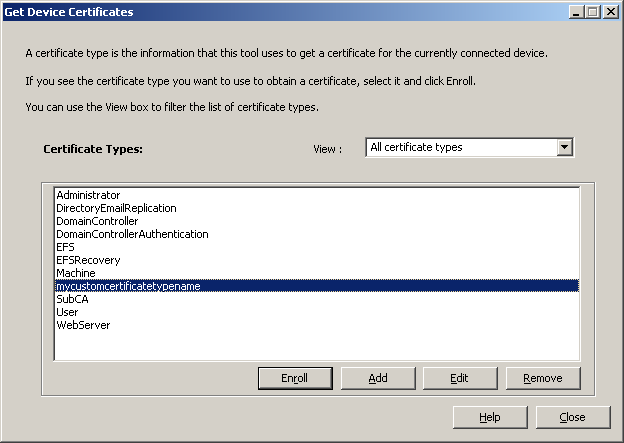
Older versions of Windows Mobile such as WM5 are not supported by the
enroller included with ActiveSync 4.5: the menu option "Get Device
Certificates" will remain ghosted.
This is not a tutorial on web enrolment. If you encounter problems,
contact the vendor of your device (or try contacting Microsoft Support).
First, you need to configure your Windows Server to web enrolment:
- Install IIS on your Windows Server.
- Install Certificate
Services CA and Certificate Services Web Enrollment (screenshots)
on your Windows Server.
- According to the Windows Help file, if you installed IIS after
installing CA services, you need to run "certutil -vroot".
- The Windows Server must be configured to immediately issue
certificates (no human interaction required), otherwise the client will
abort the web enrolment procedure. Open Certificate Authority (mmc
certsrv.msc), open the properties of your CA, click the tab
"Policy module ", click Properties, pick "Follow the setting in the
certificate template, if applicable. Otherwise, automatically issue the
certificate". This obviously means that you don't have manual
control over what certificates are issued to whom, but that's the way
it is.
- You may have to load the Authenticated Session and User Signature
Only templates.
- Test your certificate web enrolment setup by using a browser on
a desktop PC. Obtain a "User" certificate by surfing to:
http://exchange.example.com/certsrv where exchange.example.com
is
the hostname of your Windows Server. You will be asked for your account
credentials (a valid username and password) to enrol for a
certificate. Depending on your IIS settings you may need to use HTTPS
instead.
- Verify in Certificate Authority (mmc certsrv.msc) that
the test
certificate has been issued. It should be in the "issued" folder, not
in
"pending", "revoked" or "failed". You should now be able to pick up and
install the certificate on the desktop PC.
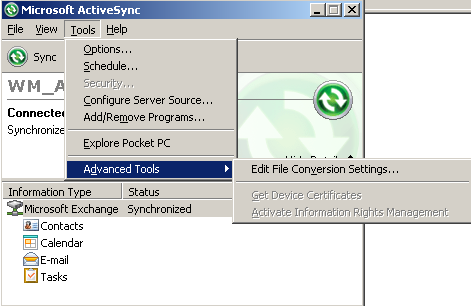
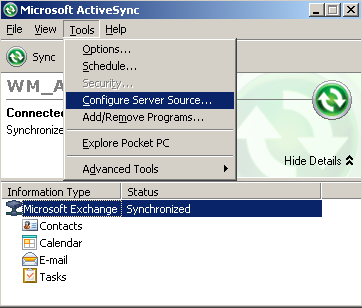
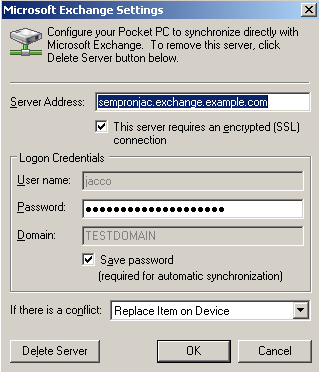
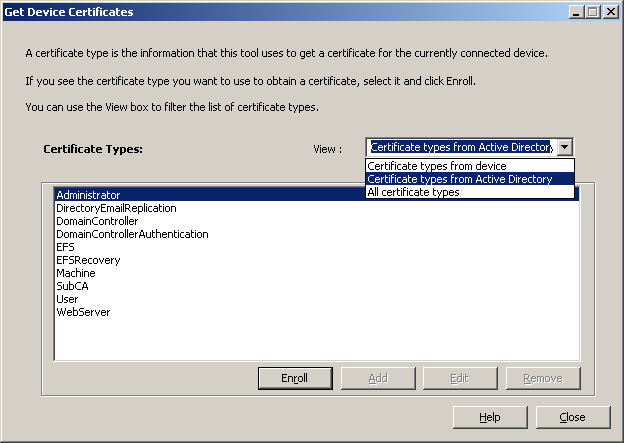
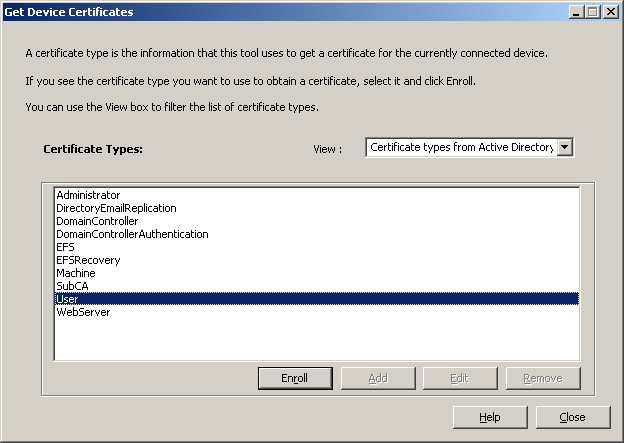
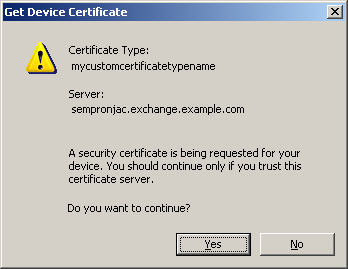
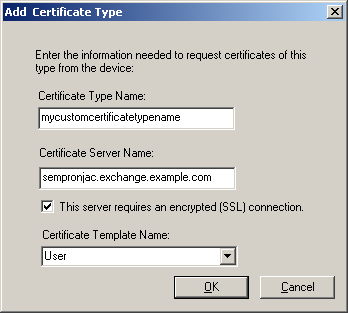
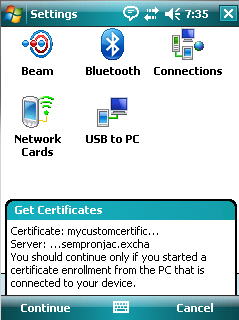
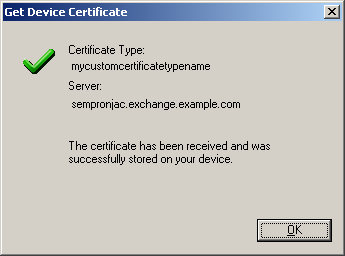
Then, you use ActiveSync on your PC to enrol at the CA server:
7.2 Web enrolment with
Windows Vista Mobile Device Center
Windows Vista requires the Vista Mobile Device Center. Apparently
there is already some kind of rudimentary Mobile Device Center included
with Windows Vista, but you still need to download and install the full
Mobile
Device Center from the Microsoft website. Microsoft provides some
instructions but these are minimal. See the section "Setting up
your device for certificate enrolment". I have not tried it myself but
this document claims that enrolment is "automatic" and that it
requires Exchange server. I could not find a place to enter the
Exchange server's address in Vista Mobile Device Center, so I assume
that Outlook is also required on the desktop PC. Mind you, ActiveSync
'only' required IIS / Microsoft
Certificate Services but not Exchange server or Outlook. So, migrating
to Vista
means buying into Microsoft's other product offerings as well, if you
insist on using web
enrolment. This increases the cost of ownership.
UPDATE: a new version of the Windows Mobile Device Center
is available.
It appears to support certificate enrolment with WM6 devices, but it
requires Exchange Server. This increases the
cost of ownership significantly.
Back to Contents
8.
Acknowledgements and disclaimers
My crack team of lawyers advised me to include the following text.
This
page shows screenshots of a device resembling a Pocket PC but this does
not
necessarily mean an endorsement of or by any company. I disclaim
everything anyway :-). Windows,
Windows Mobile, Pocket PC and Windows CE are trademarks of Microsoft Corporation.
The author of this webpage is not associated with Microsoft or any
other company mentioned on the page. All
trademarks are owned by their respective companies.
Back to Contents
9. Revision history
May 21, 2007: Initial version. WM6 emulator images available.
Jacco de Leeuw